Hello Gorgeous Lamp, Wanna Come Over and See My Etchings?
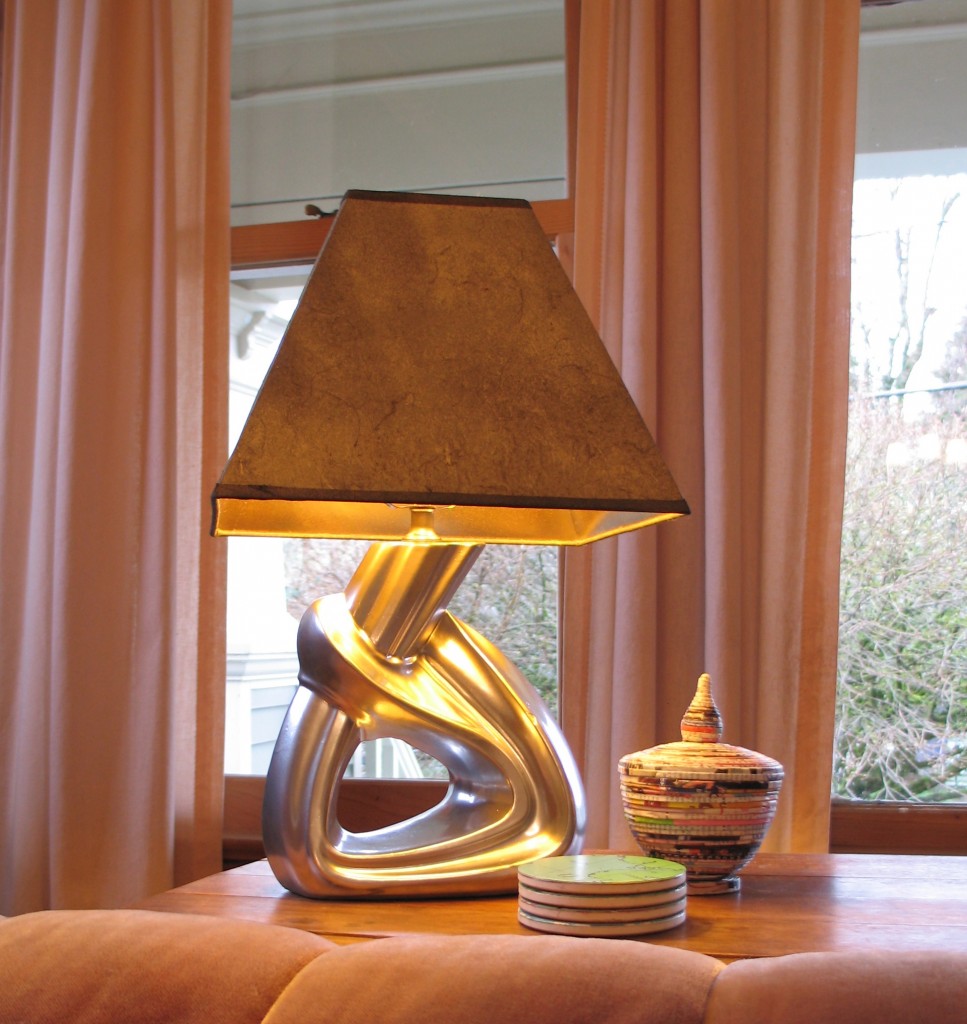
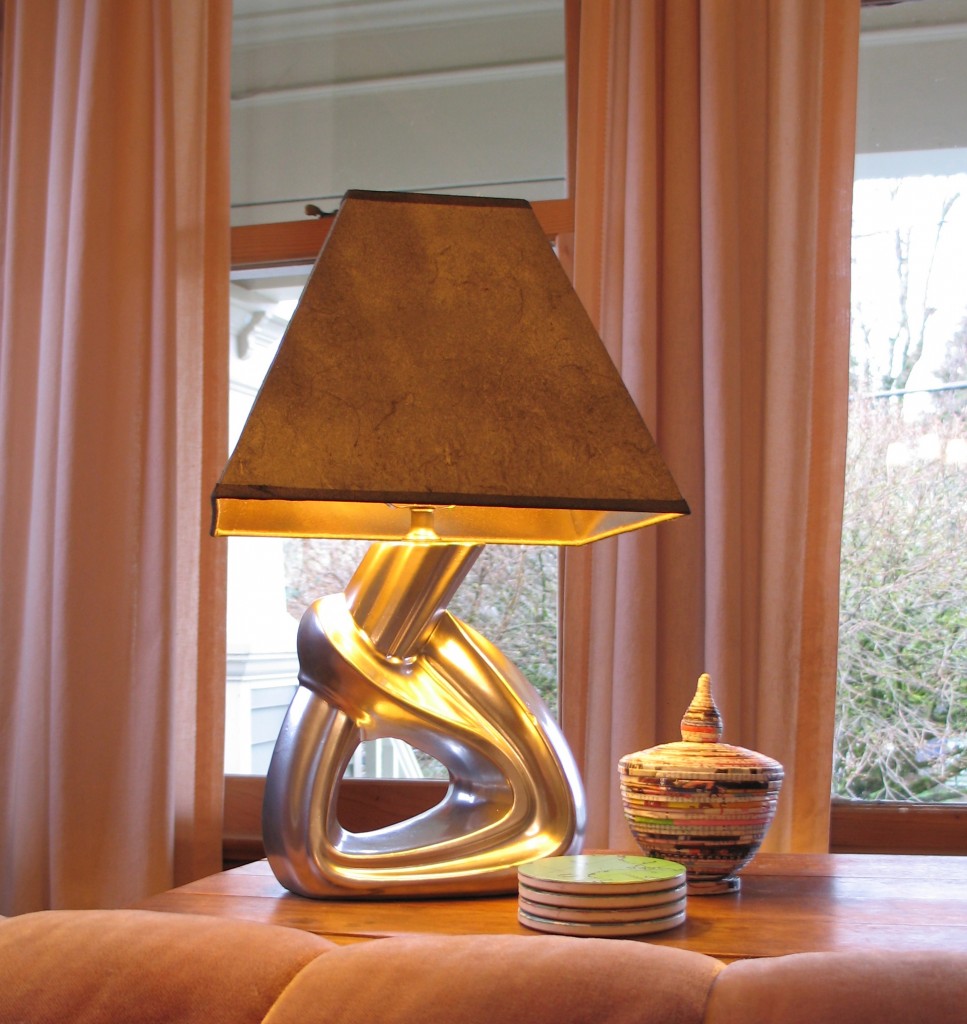
It may have taken awhile, but I finally finished refurbishing my vintage Goodwill lamp. And yes, I'm really happy with how it turned out. It's shiny, it's chrome-y, it's solid without being clunky, and yes, it's tubular. (Sorry, I couldn't help myself.) My original plan had been to use the perfectly good electrical guts from a broken floor lamp, but I was having trouble figuring out which parts went where, so I broke down and bought a $8.99 make-a-lamp kit from Home Depot. (I did use a promo $1 gift card.)
The process of rewiring the lamp was super finicky and took a couple of hours. Why? Because all that tubular-goodness made it extremely difficult to thread the wiring from bottom to top. I ended up needing to use a flashlight and a paperclip converted into a fishing hook to complete the job, and it took me a lot of time to figure this out. Luckily, this kind of project is perfect for evening TV-watching, so it ended up being a pleasant-enough task in the end.
I did have to give up on snaking the wiring through the teeny-tiny exit hole from the bottom of the lamp, but I'm okay with that.
See what I mean?
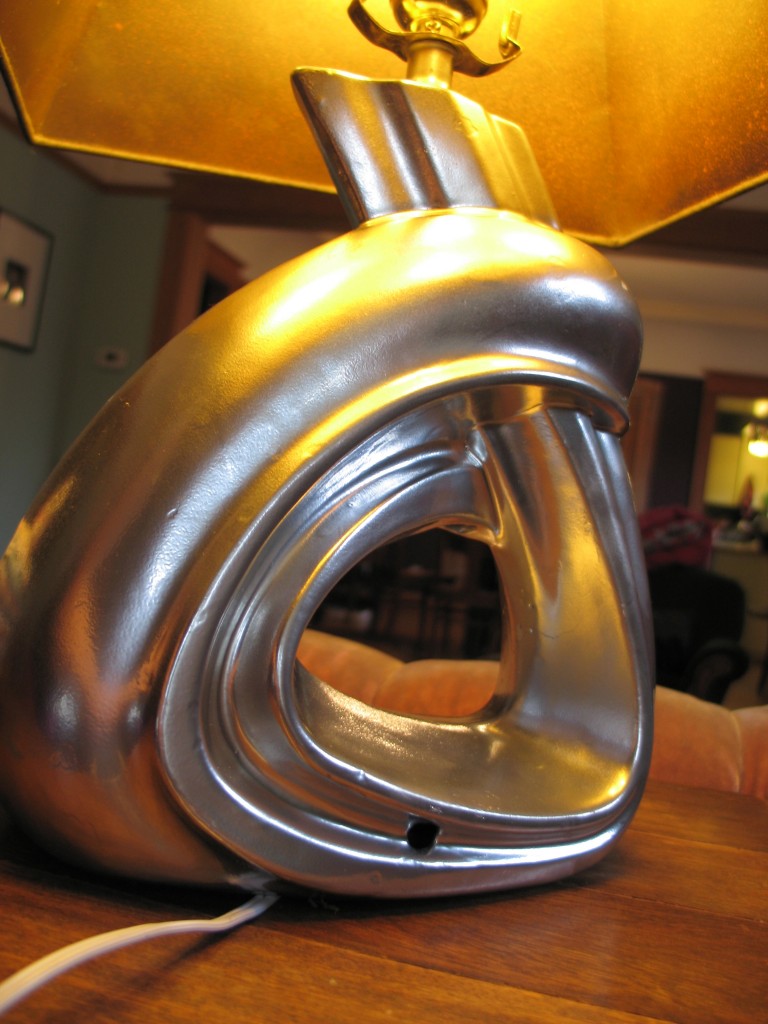
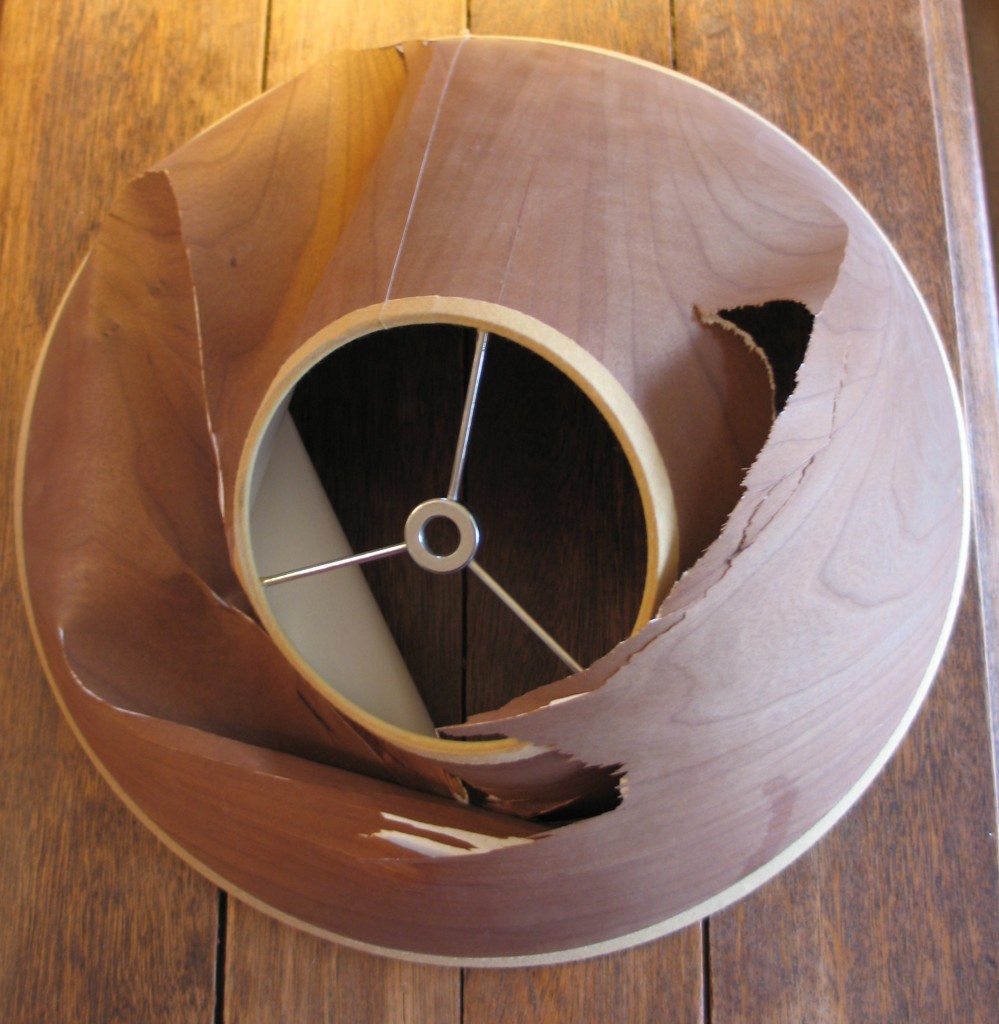
Do you like how my Goodwill-purchased $1.99 lampshade is painted gold on the inside? It casts a lovely golden glow onto the lamp, which is very pretty. Sadly though, this lampshade has been my second choice. I had also Goodwill-ed a teak veneer lampshade which had a much hipper vibe. Unfortunately, the metal spokes were slightly uneven, so I had the great idea to press down on the top to fix this problem. However, I may have pressed a wee bit too hard:
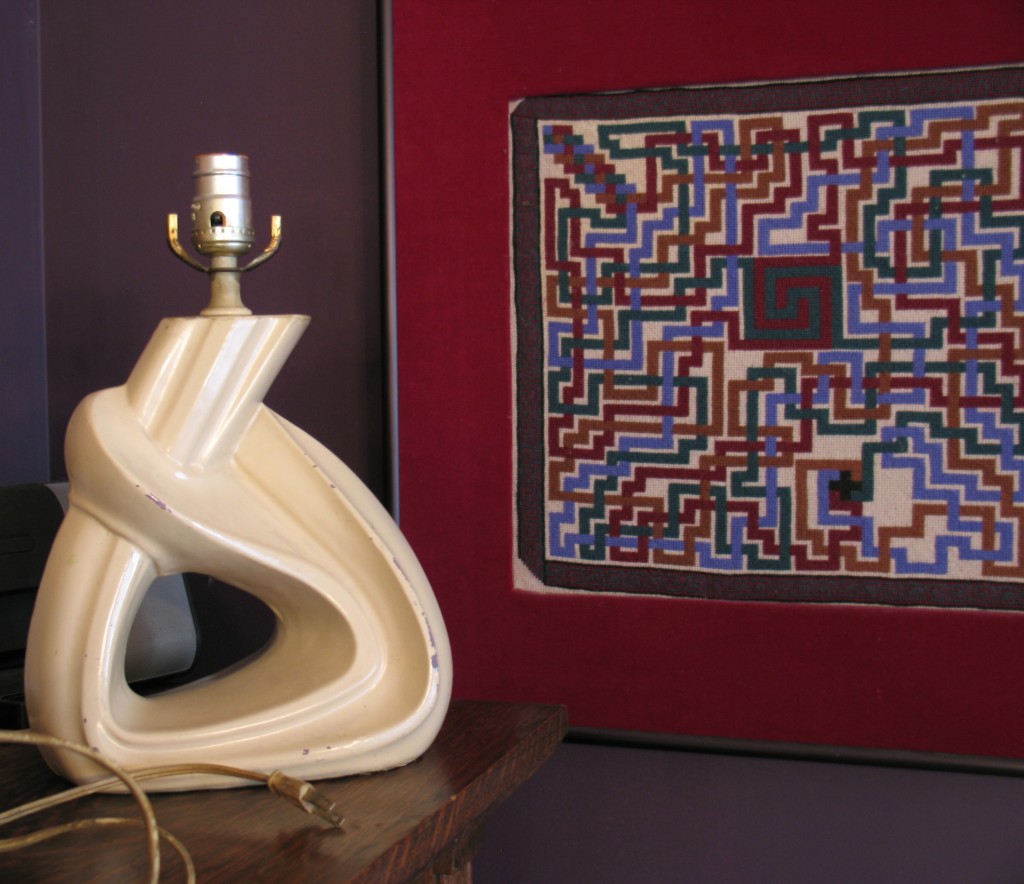
And for all of you you enjoy a good before-and-after, here's a complete evolution of the lamp:
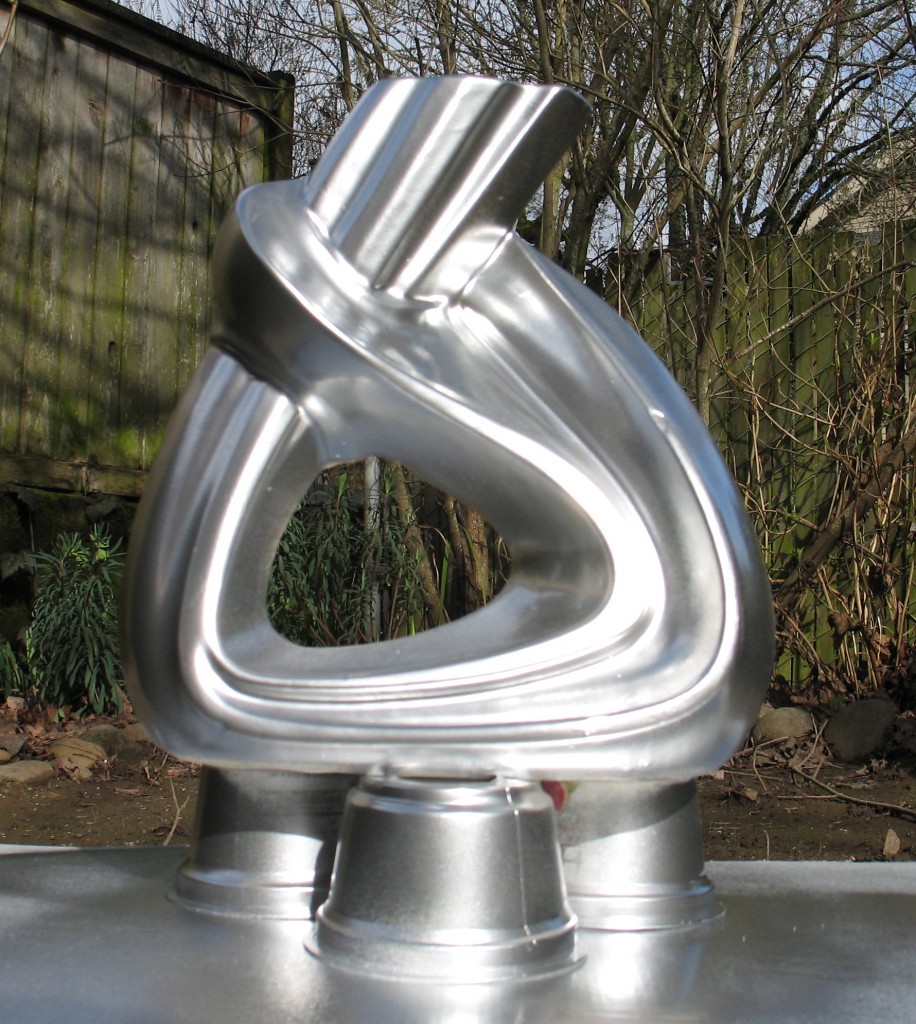
Now, it's on to my project chairs. C'mon, sunny weather!
Katy Wolk-Stanley
"Use it up, wear it out, make it do or do without"
Click HERE to follow The Non-Consumer Advocate on Twitter.
Click HERE to join The Non-Consumer Advocate Facebook group.
Click HERE to follow The Non-Consumer Advocate on Pinterest.


Lovely!!! Actually, I like the rectangular shade better than the round one. The sharp edges of the rectangular shade accentuate the curves of the groovy lamp. The glow from the gold interior is terrific.
Thanks, I do think that the gold glow is pretty yummy. I think I will keep an eye out for a drum shade though. (And paint it gold on the inside?)
Katy
I agree with Ann about the rectangular shade.
That lamp completely rocks! Yup, I'd be proud.
I'm so impressed that you could look at the before lamp, and see the after in your imagination. You did a fantastic job - and I think the shade on it probably works better anyway. Well done!
Thanks. The hard part isn't seeing the "after." The hard part is actually doing it!
Katy
You did a really good job. Looks like a professional restoration project.
And you expect sunny weather in your neck of the woods so you can move on to the chairs?
I do not expect any sunny weather, but this native Oregonian knows to expect the unexpected. 😀
Katy
Fabulous job on the lamp. I'd like to know more about the "jar" next to it.
The "jar" was something that the Japanese exchange teacher left behind. It looks to be made from old magazine pages. I'm not yet whether I like it or not.
Katy
WOW!!!!
everytime you have shown us your retro lamp I couldn't really see what made it so appealing to you.
the style isn't something I would ever choose, but i must say you turned it into a gem.
Nicely done.
Good job, Katy! I love how dedicated you are to your projects. You have been an inspiration to me when I come up against self doubt and finishing some of my projects.
Don't worry, I'm always procrastinating something. And there are enough unfinished projects in this house to go around.
Katy
Yeah, I think I over-think things, like what if it doesn't turn out. I just need to proceed and have fun with the projects on my list.
If I over-plan things I end up not doing them.
Katy
It's lovely....all your before and after pictures reminds me of my 4-H days when I took photos to show my steps to complete projects... I give your lamp a blue ribbon!
Looks great, Katy.
What kind of paint did you use on the inside of the shade, do you mind sharing?
The lampshade came as-is with the gold interior. 🙂
Katy
Heh. Thanks!
i think the square shade looks much better then the round one! Gives it more spunk....
Well, she is a spunky gal!
Katy
I agree with others about the angular shade - I really like it.
maybe on the next lamp--and you know there will be one--you can tie the old "guts" to the new and pull them thru the lamp so you can use the little hole, kind of like threading the loopers of a serger by tying new thread on and pulling it thru to avoid the fiddly parts. or maybe you tried that and all those great curves wouldn't allow it. your finished lamp looks great. i cast another vote for the angular shade. 🙂
That never even occurred to me, especially since there was so much sanding and painting that went on, but I will definitely tuck this nugget of information away for next time!
Katy
Thanks for the inspiration. I need to tackle the light that my grandpa made for me. It has been in the garage for awhile and for some reason I think that it doesn't work anymore and will need to be rewired. I'm hoping that I'm wrong but I'm probably not.
I too love the rectangular shade - looks like a very expensive shade to me, and the lamp is fabulous!
Stunning! You did an excellent job on making your lamp into a one of a kind treasure. The rectangular shade is the perfect match. Great Job!